Leak of a new ready-made server assembly REDAGE RP 3.0 (full working version) for RAGE Multiplayer.
Published in public access by one of the buyers after the sale in this topic.
The server modification is written in C# + JavaScript + Svelte (CEF interfaces).
The server part uses a database - MySQL + Redis.
See all screenshots of the server functionality and a video tutorial on installation at the bottom of the page.
Installing and running the server on Windows (text version):
Please note! To run this server build, you must have the following programs installed:
Source code editor - Visual Studio (Community).
Download - https://visualstudio.microsoft.com
NodeJS platform (I recommend using Node Version Manager).
Download - https://github.com/coreybutler/nvm-windows/releases (requires the version of NodeJS itself - 16.14.0)
Database server - MySQL (MariaDB 10.5)
Download - https://mariadb.org/
Additional database for the server - Redis Server
Download - https://github.com/microsoftarchive/redis/releases
1.Download the archive and extract all the files to a convenient location (not recommended on the desktop, better directly to one of the disks).
2.Here is a folder with server files, what does it contain?
src_client - source files of the client part
src_cef - source files of the visual part (interfaces)
dotnet\resources - source files of the server part
database - folder with .sql dumps for the database
settings - folder with different server settings
3.The next step is to install the correct version of NodeJS + install modules and build CEF sources.
You should already have NVM (Node Version Manager) installed, if not - the link is just above.
Go to the folder - src_cef and open the command line (SHIFT + RMB in an empty space of the folder - then click on PowerShell), then enter the following commands:
All these commands MUST BE EXECUTED WITHOUT ERRORS, if you have them - try again or watch the video.
4.The next step is to install modules and build the CLIENT sources.
Go to the folder - src_client and open the command line (SHIFT + RMB in an empty space of the folder - then click on PowerShell), then enter the following commands:
5.The next step is to install the MySQL database server + create databases and populate them.
You should already have MariaDB 10.5 installed, if not, the link is just above.
Open the HeidiSQL program, connect to the local database and create THREE NEW DATABASES:
ra3_main
ra3_mainconfig
ra3_mainlogs
When creating all databases, select the encoding - UTF8.
After creation, import the corresponding SQL dumps from the - databases folder into these databases (if it is not clear, watch the video).
6.
The next step is the Server part (editing DB configs + building the project).
You should already have the program installed - Visual Studio (+ .NET Desktop Development package), if not - the link is just above.
Go to the dotnet/resources folder and open the file - NeptuneEvo.sln.
On the right side of the program there is a window - Solution Explorer, there we find and open the file:
NeptuneEvo/Database/Config/Config.tt in this file on line 26 specify your data for connecting MySQL.
After entering the data, press Ctrl + S then press YES if you are asked for confirmation.
In the same right part of the program, we find and open the file:
NeptuneEvo/Database/Server/ServerStruct.tt in this file on line 24 specify your data for connecting MySQL.
After entering the data, press Ctrl + S then press YES if you are asked for confirmation.
After you have filled in both of these files, at the top of the program, click: Build - Rebuild solution
At the bottom, in the Output tab, it should say: Successful - 3 (this is an indicator that everything is correct at this stage).
7.The next step is to edit the last 3rd DB config (which many forget about).
Go to the settings folder and open the file - mainDB.json.
In it, simply specify your data for connecting MySQL.
8.The penultimate step is to install Redis Server.
You should ALREADY have it installed, if not, the link is just above.
9.The last step is to download and unpack the dlcpacks.
In the server folder we find the file - client_packages/game_resources/dlcpacks/dlcpacks.txt in this text document there will be a link to download the archive with all dlcpacks, download and unzip the contents of the archive next to the text file.
10.Voila, the installation is complete, you can run the server, the file is ragemp-server.exe.
If you are not 5 years old and you can read and watch videos, the server will start without errors.
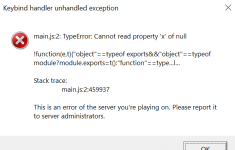
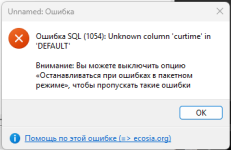
If you have errors - read the DISCUSSIONS tab, many of them were discussed and solutions were found..
I hope the manual for installing this RAGE:MP server is clear to you, I tried to describe it in as much detail as possible.
But suddenly if something is not clear - join our Discord server and we will help.
There are bugs in this build. Perhaps I will fix them someday, write a list of bugs in the discussion.
 The admin panel is issued in the database, table - characters, column - adminlvl, maximum level - 10
 Full server files BEFORE my fixes and changes, including those containing the CDN archive can be found here:
Download
Published in public access by one of the buyers after the sale in this topic.
The server modification is written in C# + JavaScript + Svelte (CEF interfaces).
The server part uses a database - MySQL + Redis.
See all screenshots of the server functionality and a video tutorial on installation at the bottom of the page.
Installing and running the server on Windows (text version):
Please note! To run this server build, you must have the following programs installed:
Source code editor - Visual Studio (Community).
Download - https://visualstudio.microsoft.com
NodeJS platform (I recommend using Node Version Manager).
Download - https://github.com/coreybutler/nvm-windows/releases (requires the version of NodeJS itself - 16.14.0)
Database server - MySQL (MariaDB 10.5)
Download - https://mariadb.org/
Additional database for the server - Redis Server
Download - https://github.com/microsoftarchive/redis/releases
1.Download the archive and extract all the files to a convenient location (not recommended on the desktop, better directly to one of the disks).
2.Here is a folder with server files, what does it contain?
src_client - source files of the client part
src_cef - source files of the visual part (interfaces)
dotnet\resources - source files of the server part
database - folder with .sql dumps for the database
settings - folder with different server settings
3.The next step is to install the correct version of NodeJS + install modules and build CEF sources.
You should already have NVM (Node Version Manager) installed, if not - the link is just above.
Go to the folder - src_cef and open the command line (SHIFT + RMB in an empty space of the folder - then click on PowerShell), then enter the following commands:
Code:
nvm install 16.14.0
nvm use 16.14.0
npm install --legacy-peer-deps
npm run build
All these commands MUST BE EXECUTED WITHOUT ERRORS, if you have them - try again or watch the video.
4.The next step is to install modules and build the CLIENT sources.
Go to the folder - src_client and open the command line (SHIFT + RMB in an empty space of the folder - then click on PowerShell), then enter the following commands:
Code:
npm install
npm run build
5.The next step is to install the MySQL database server + create databases and populate them.
You should already have MariaDB 10.5 installed, if not, the link is just above.
Open the HeidiSQL program, connect to the local database and create THREE NEW DATABASES:
ra3_main
ra3_mainconfig
ra3_mainlogs
When creating all databases, select the encoding - UTF8.
After creation, import the corresponding SQL dumps from the - databases folder into these databases (if it is not clear, watch the video).
6.
The next step is the Server part (editing DB configs + building the project).
You should already have the program installed - Visual Studio (+ .NET Desktop Development package), if not - the link is just above.
Go to the dotnet/resources folder and open the file - NeptuneEvo.sln.
On the right side of the program there is a window - Solution Explorer, there we find and open the file:
NeptuneEvo/Database/Config/Config.tt in this file on line 26 specify your data for connecting MySQL.
After entering the data, press Ctrl + S then press YES if you are asked for confirmation.
In the same right part of the program, we find and open the file:
NeptuneEvo/Database/Server/ServerStruct.tt in this file on line 24 specify your data for connecting MySQL.
After entering the data, press Ctrl + S then press YES if you are asked for confirmation.
After you have filled in both of these files, at the top of the program, click: Build - Rebuild solution
At the bottom, in the Output tab, it should say: Successful - 3 (this is an indicator that everything is correct at this stage).
7.The next step is to edit the last 3rd DB config (which many forget about).
Go to the settings folder and open the file - mainDB.json.
In it, simply specify your data for connecting MySQL.
8.The penultimate step is to install Redis Server.
You should ALREADY have it installed, if not, the link is just above.
9.The last step is to download and unpack the dlcpacks.
In the server folder we find the file - client_packages/game_resources/dlcpacks/dlcpacks.txt in this text document there will be a link to download the archive with all dlcpacks, download and unzip the contents of the archive next to the text file.
10.Voila, the installation is complete, you can run the server, the file is ragemp-server.exe.
If you are not 5 years old and you can read and watch videos, the server will start without errors.
If you have errors - read the DISCUSSIONS tab, many of them were discussed and solutions were found..
I hope the manual for installing this RAGE:MP server is clear to you, I tried to describe it in as much detail as possible.
But suddenly if something is not clear - join our Discord server and we will help.
There are bugs in this build. Perhaps I will fix them someday, write a list of bugs in the discussion.
Download


